You've taken the first step towards taking your organization’s quality assurance and testing process to the next level by signing up for TestMonitor.
Smart move! 😉
Now that you're aboard, it's time to get things set up for your first testing project.
To help you get started, here's a step-by-step guide to help you make the most out of TestMonitor:
1. Logging in to TestMonitor
Access your TestMonitor account by visiting the TestMonitor website and logging in with your credentials.
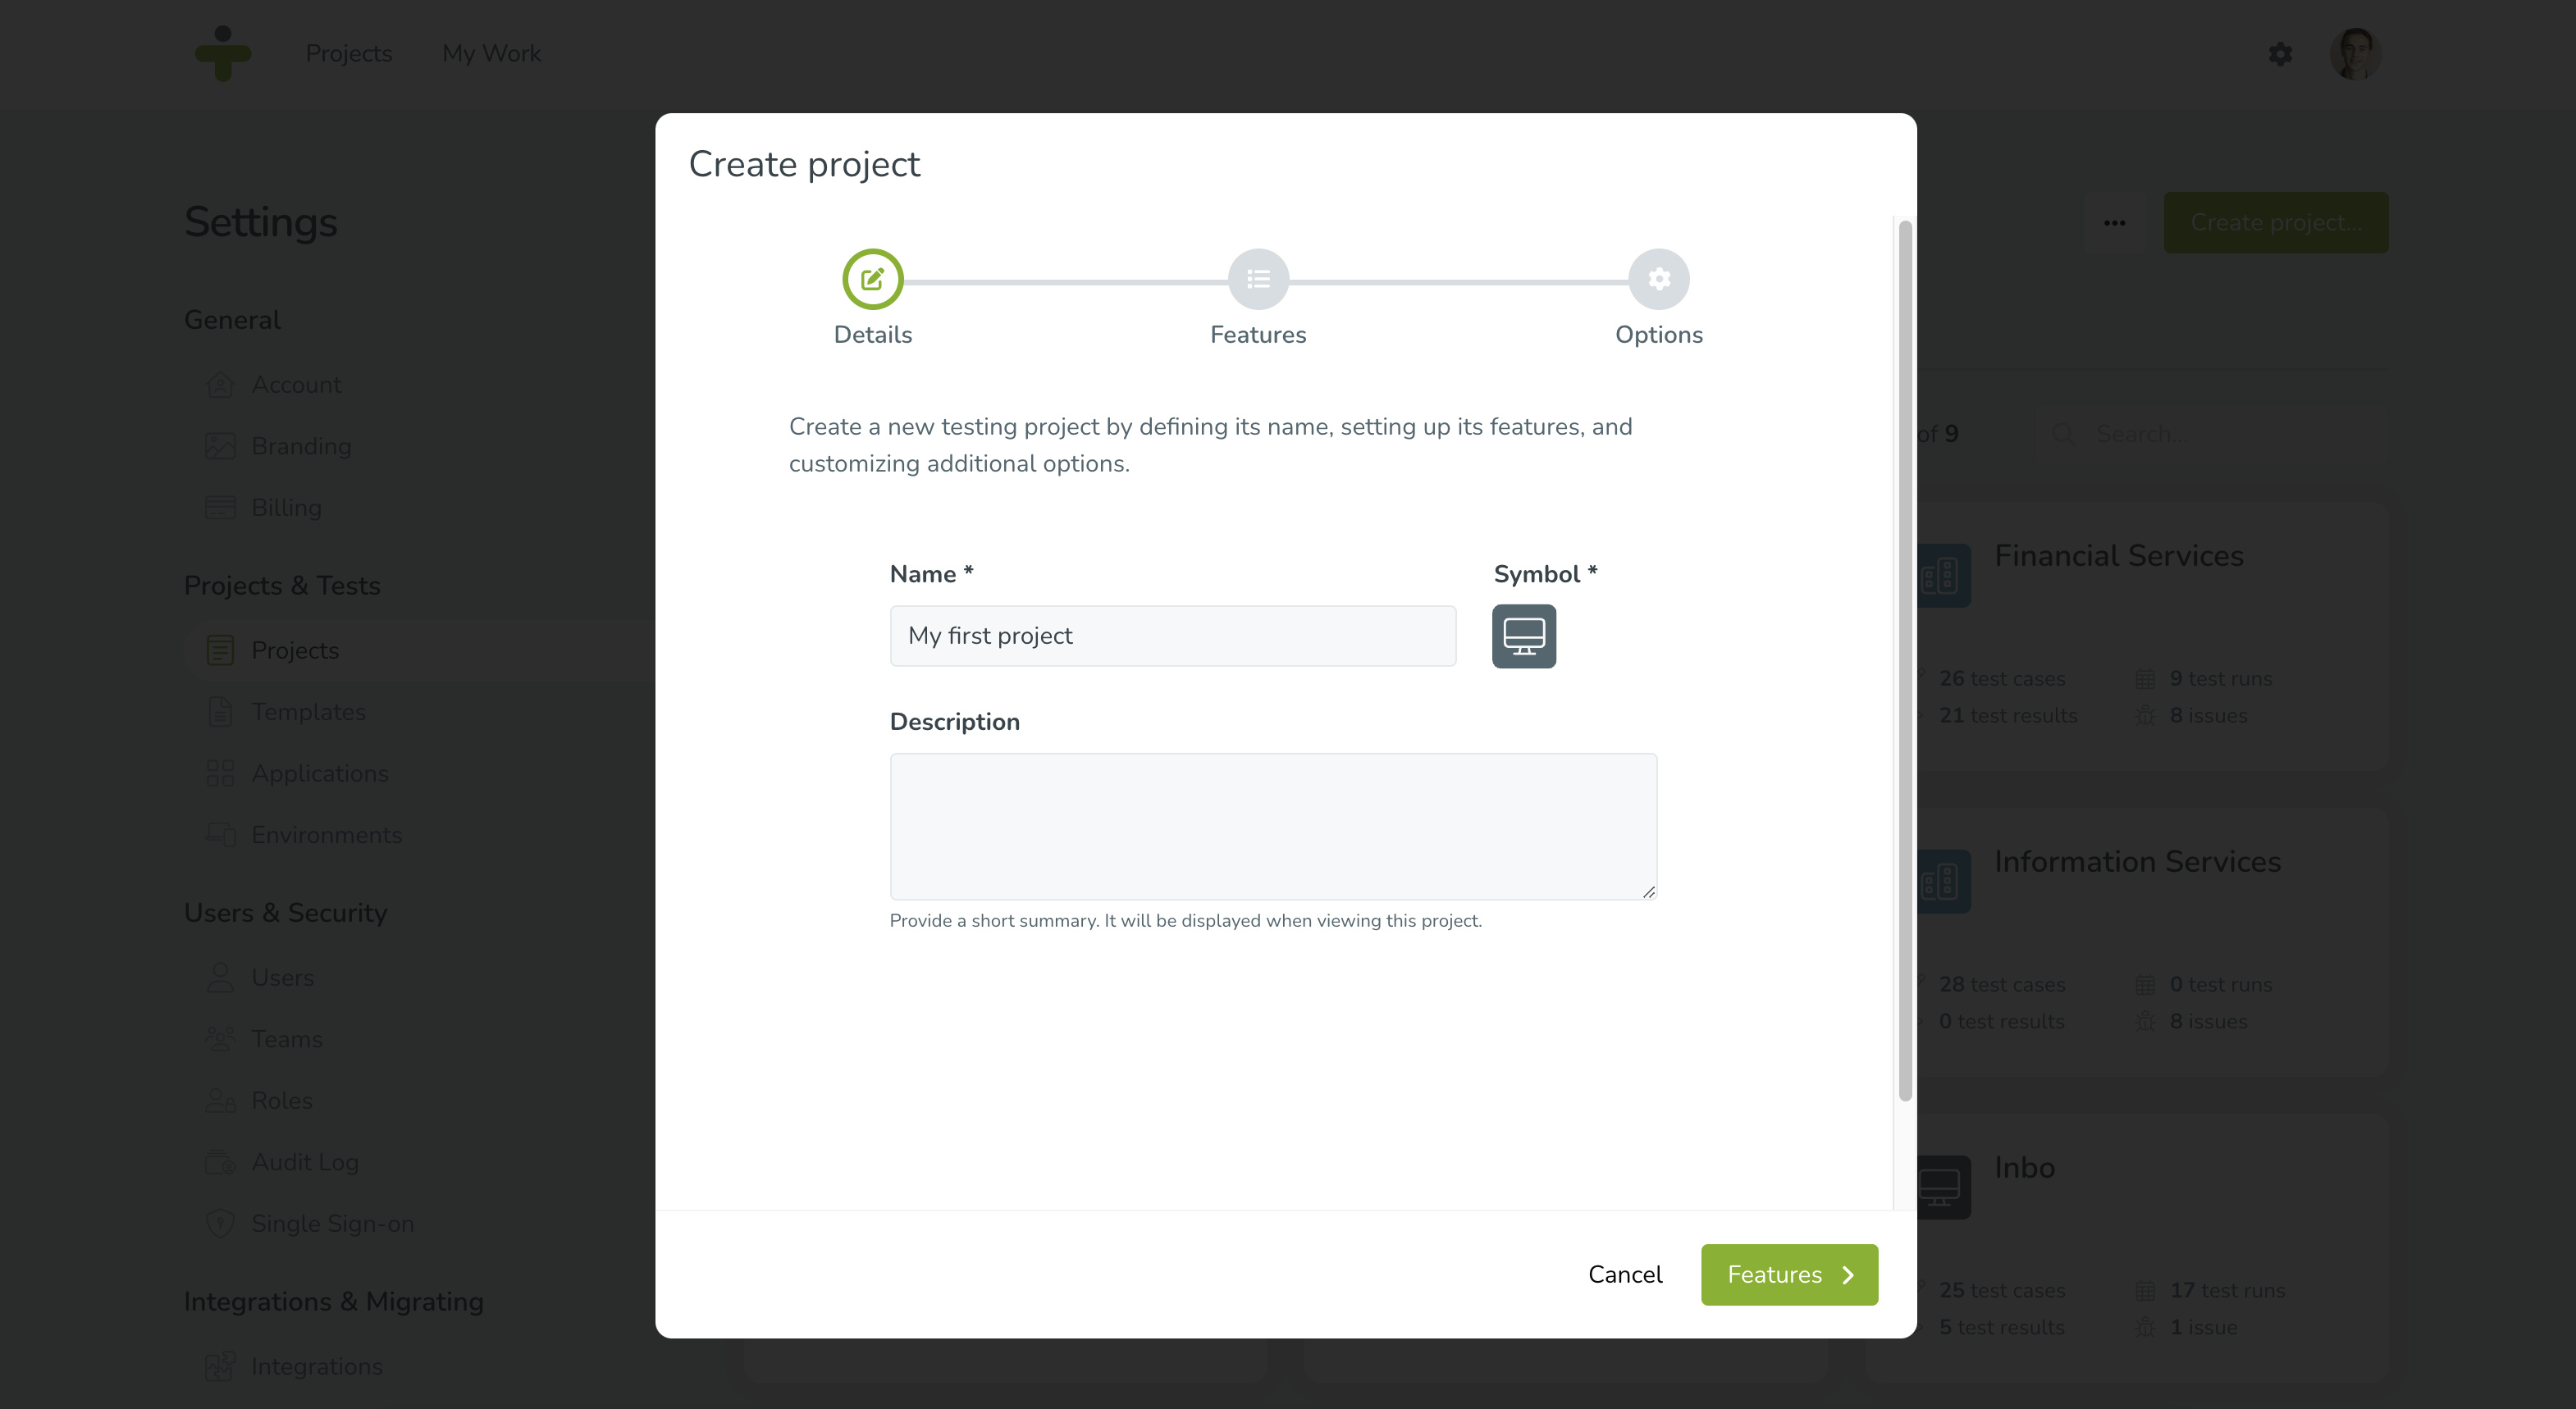
2. Creating a New Project
Navigate to the projects section or your user dashboard and proceed to 'Manage Projects.' Then click on 'Create Project' to initiate the setup process.

3. Entering Project Details
Fill in the necessary details for your test project in the New Project form.
This includes:
- Project Name
- Description
- Symbol to indicate the project type
Additionally, select the features you'll require for the project such as:
- Messages
- Requirements
- Risks
- Applications
- Issue Tracking
4. Configuring Other Project Settings
Select other project settings, as needed, including:
- Setting the project's time period by defining the start and end dates.
- Applying a template to accelerate the setup process or predefined elements.
Your project has been created. Now what?
1. Adding Team Members
Invite team members to join the project by adding their email addresses or usernames. Assign appropriate roles and permissions to each team member to determine their level of access and authority within the project.
2. Setting up Integrations
Connect TestMonitor with your team’s other task management or other software development platforms for more seamless workflow integration.

3. Adding Custom Fields
Tailor TestMonitor to your unique testing requirements by adding custom fields to capture specific testing data.

4. Defining Requirements and Risks (Optional)
Define other testing requirements and risks within the project to ensure thorough coverage and risk mitigation.
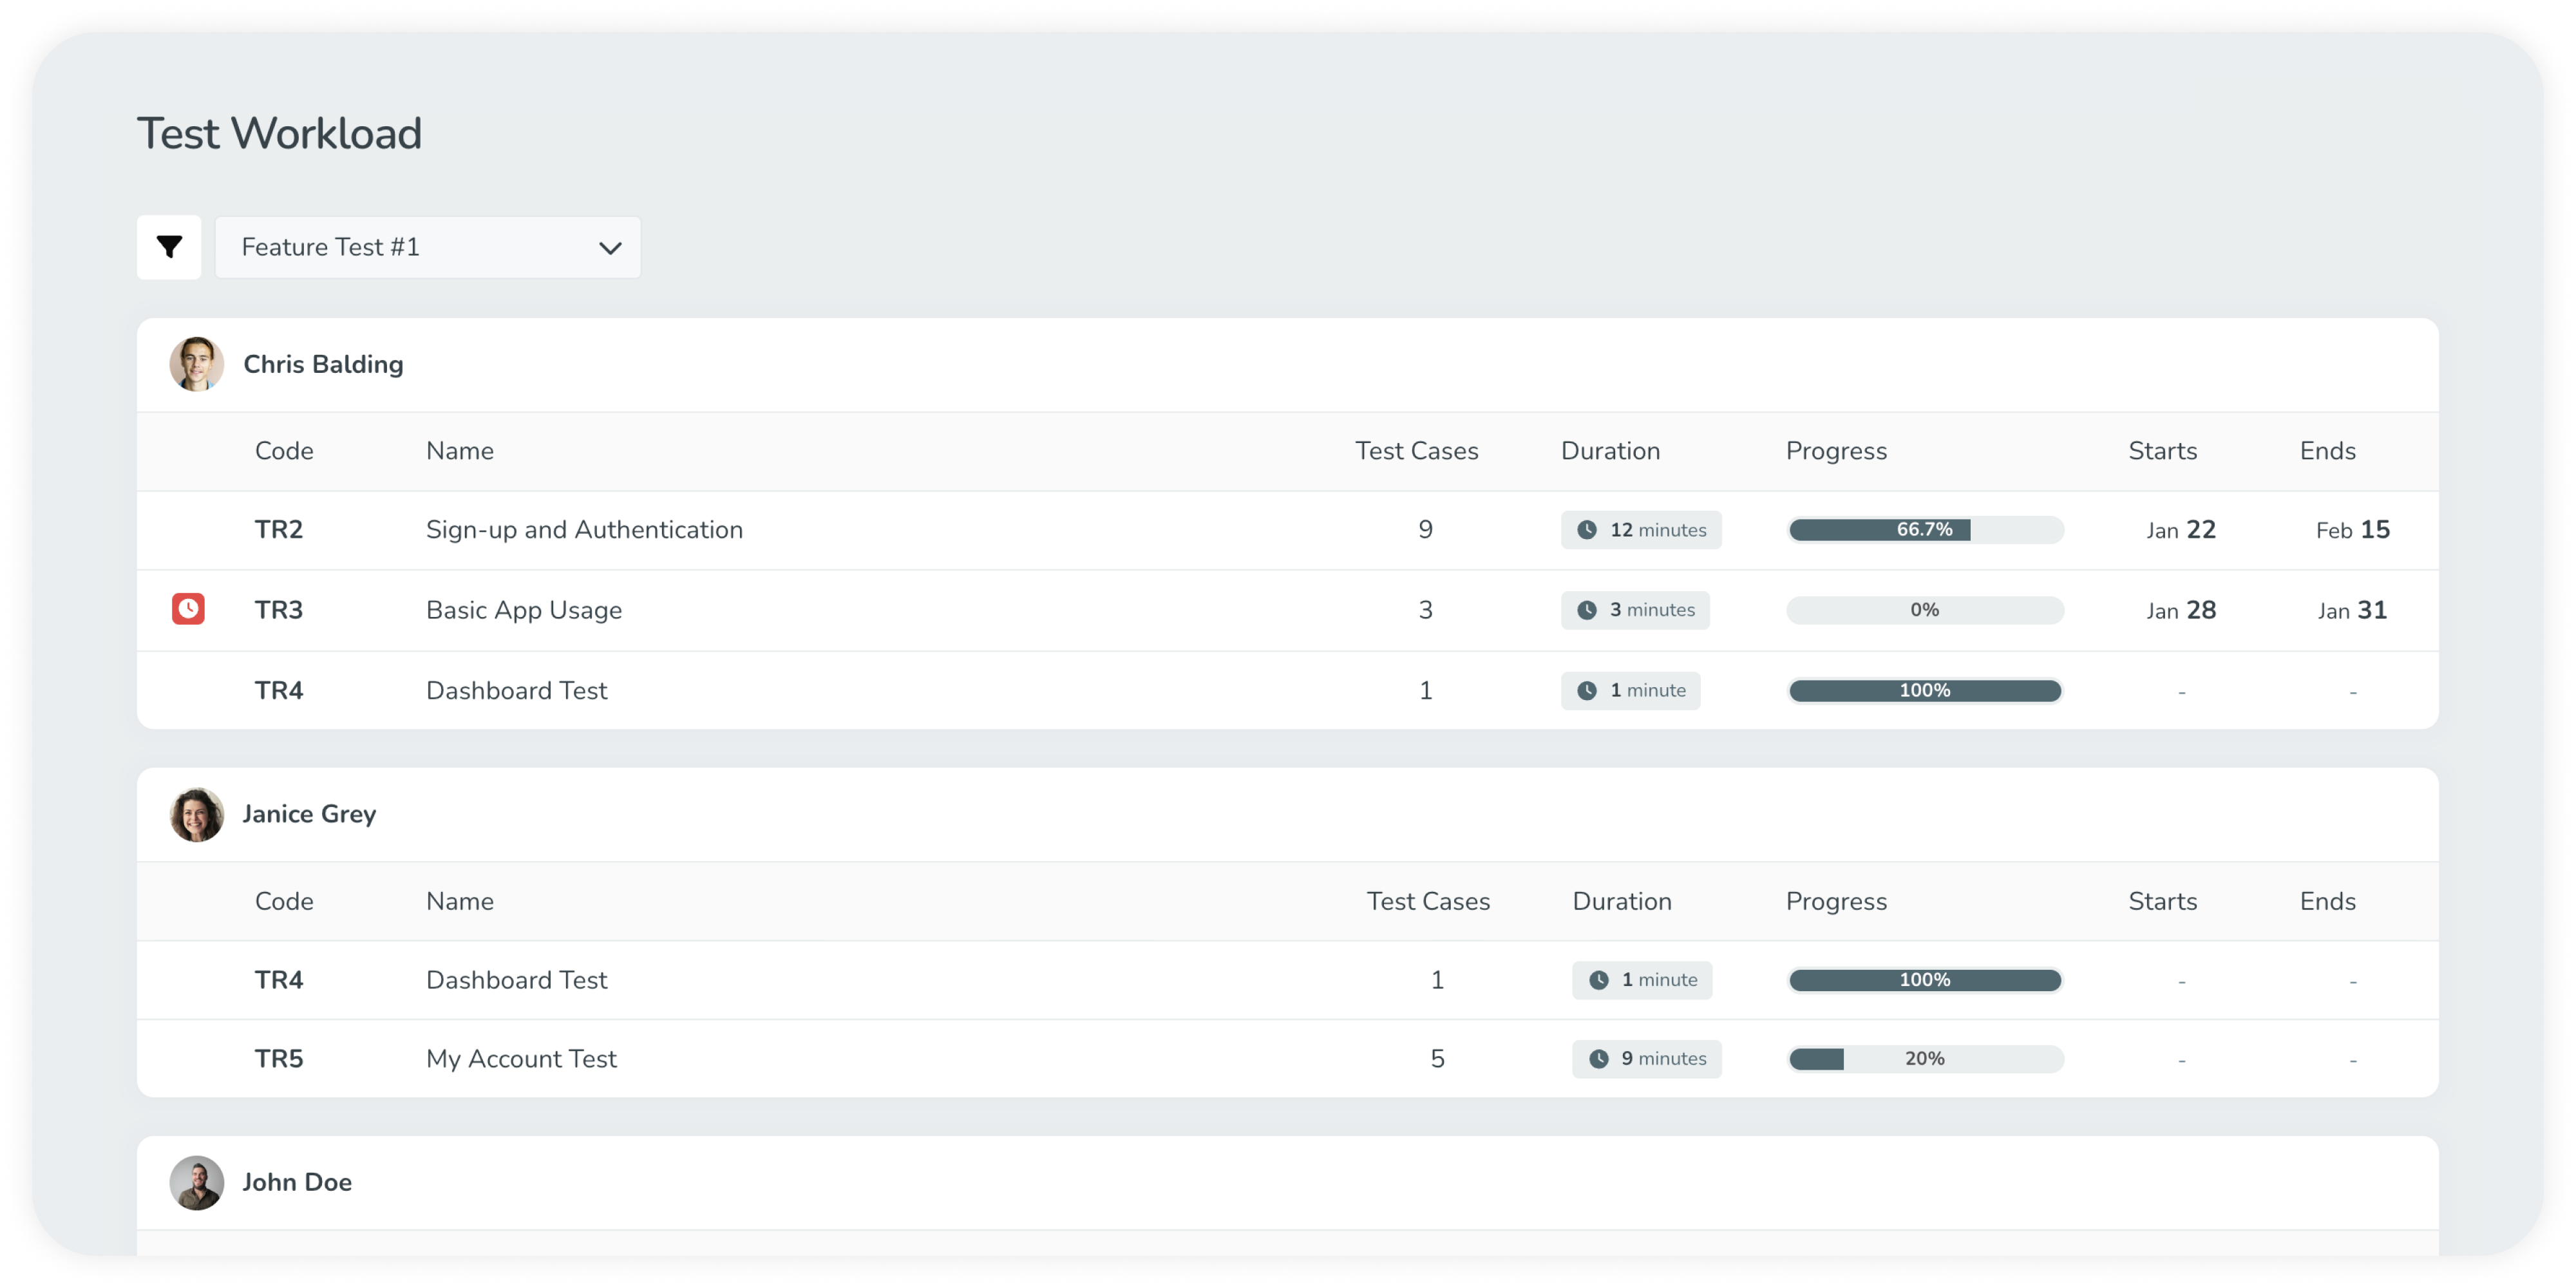
5. Creating Test Suites
Create Test Suites to organize your testing efforts and group related test cases together. (Test suites can be based on modules, features, or functional areas of your application.)
6. Adding Test Cases
Add test cases to each test suite to define the specific test scenarios, steps, expected results, and any other relevant details.

7. Assigning Test Cases
Assign test cases to team members responsible for executing them to ensure execution and verification.

8. Executing Test Cases
Commence test execution according to the defined plan and use TestMonitor to track progress, results, and issues during testing.

9. Reviewing Test Results
Monitor and review test results as they are recorded in TestMonitor. Analyze progress, identify trends, and track overall testing status to keep the team on schedule.

10. Iterating and Improving
Continuously refine your testing process based on insights gathered from test results and feedback. Utilize TestMonitor's reporting and analytics features to optimize testing effectiveness and drive improvements.
After moving through this TestMonitor Academy Article guide, your team should be well-equipped to tackle your testing efforts.
Let’s get started!

Glossary of Terms in Software Testing and the TestMonitor Platform
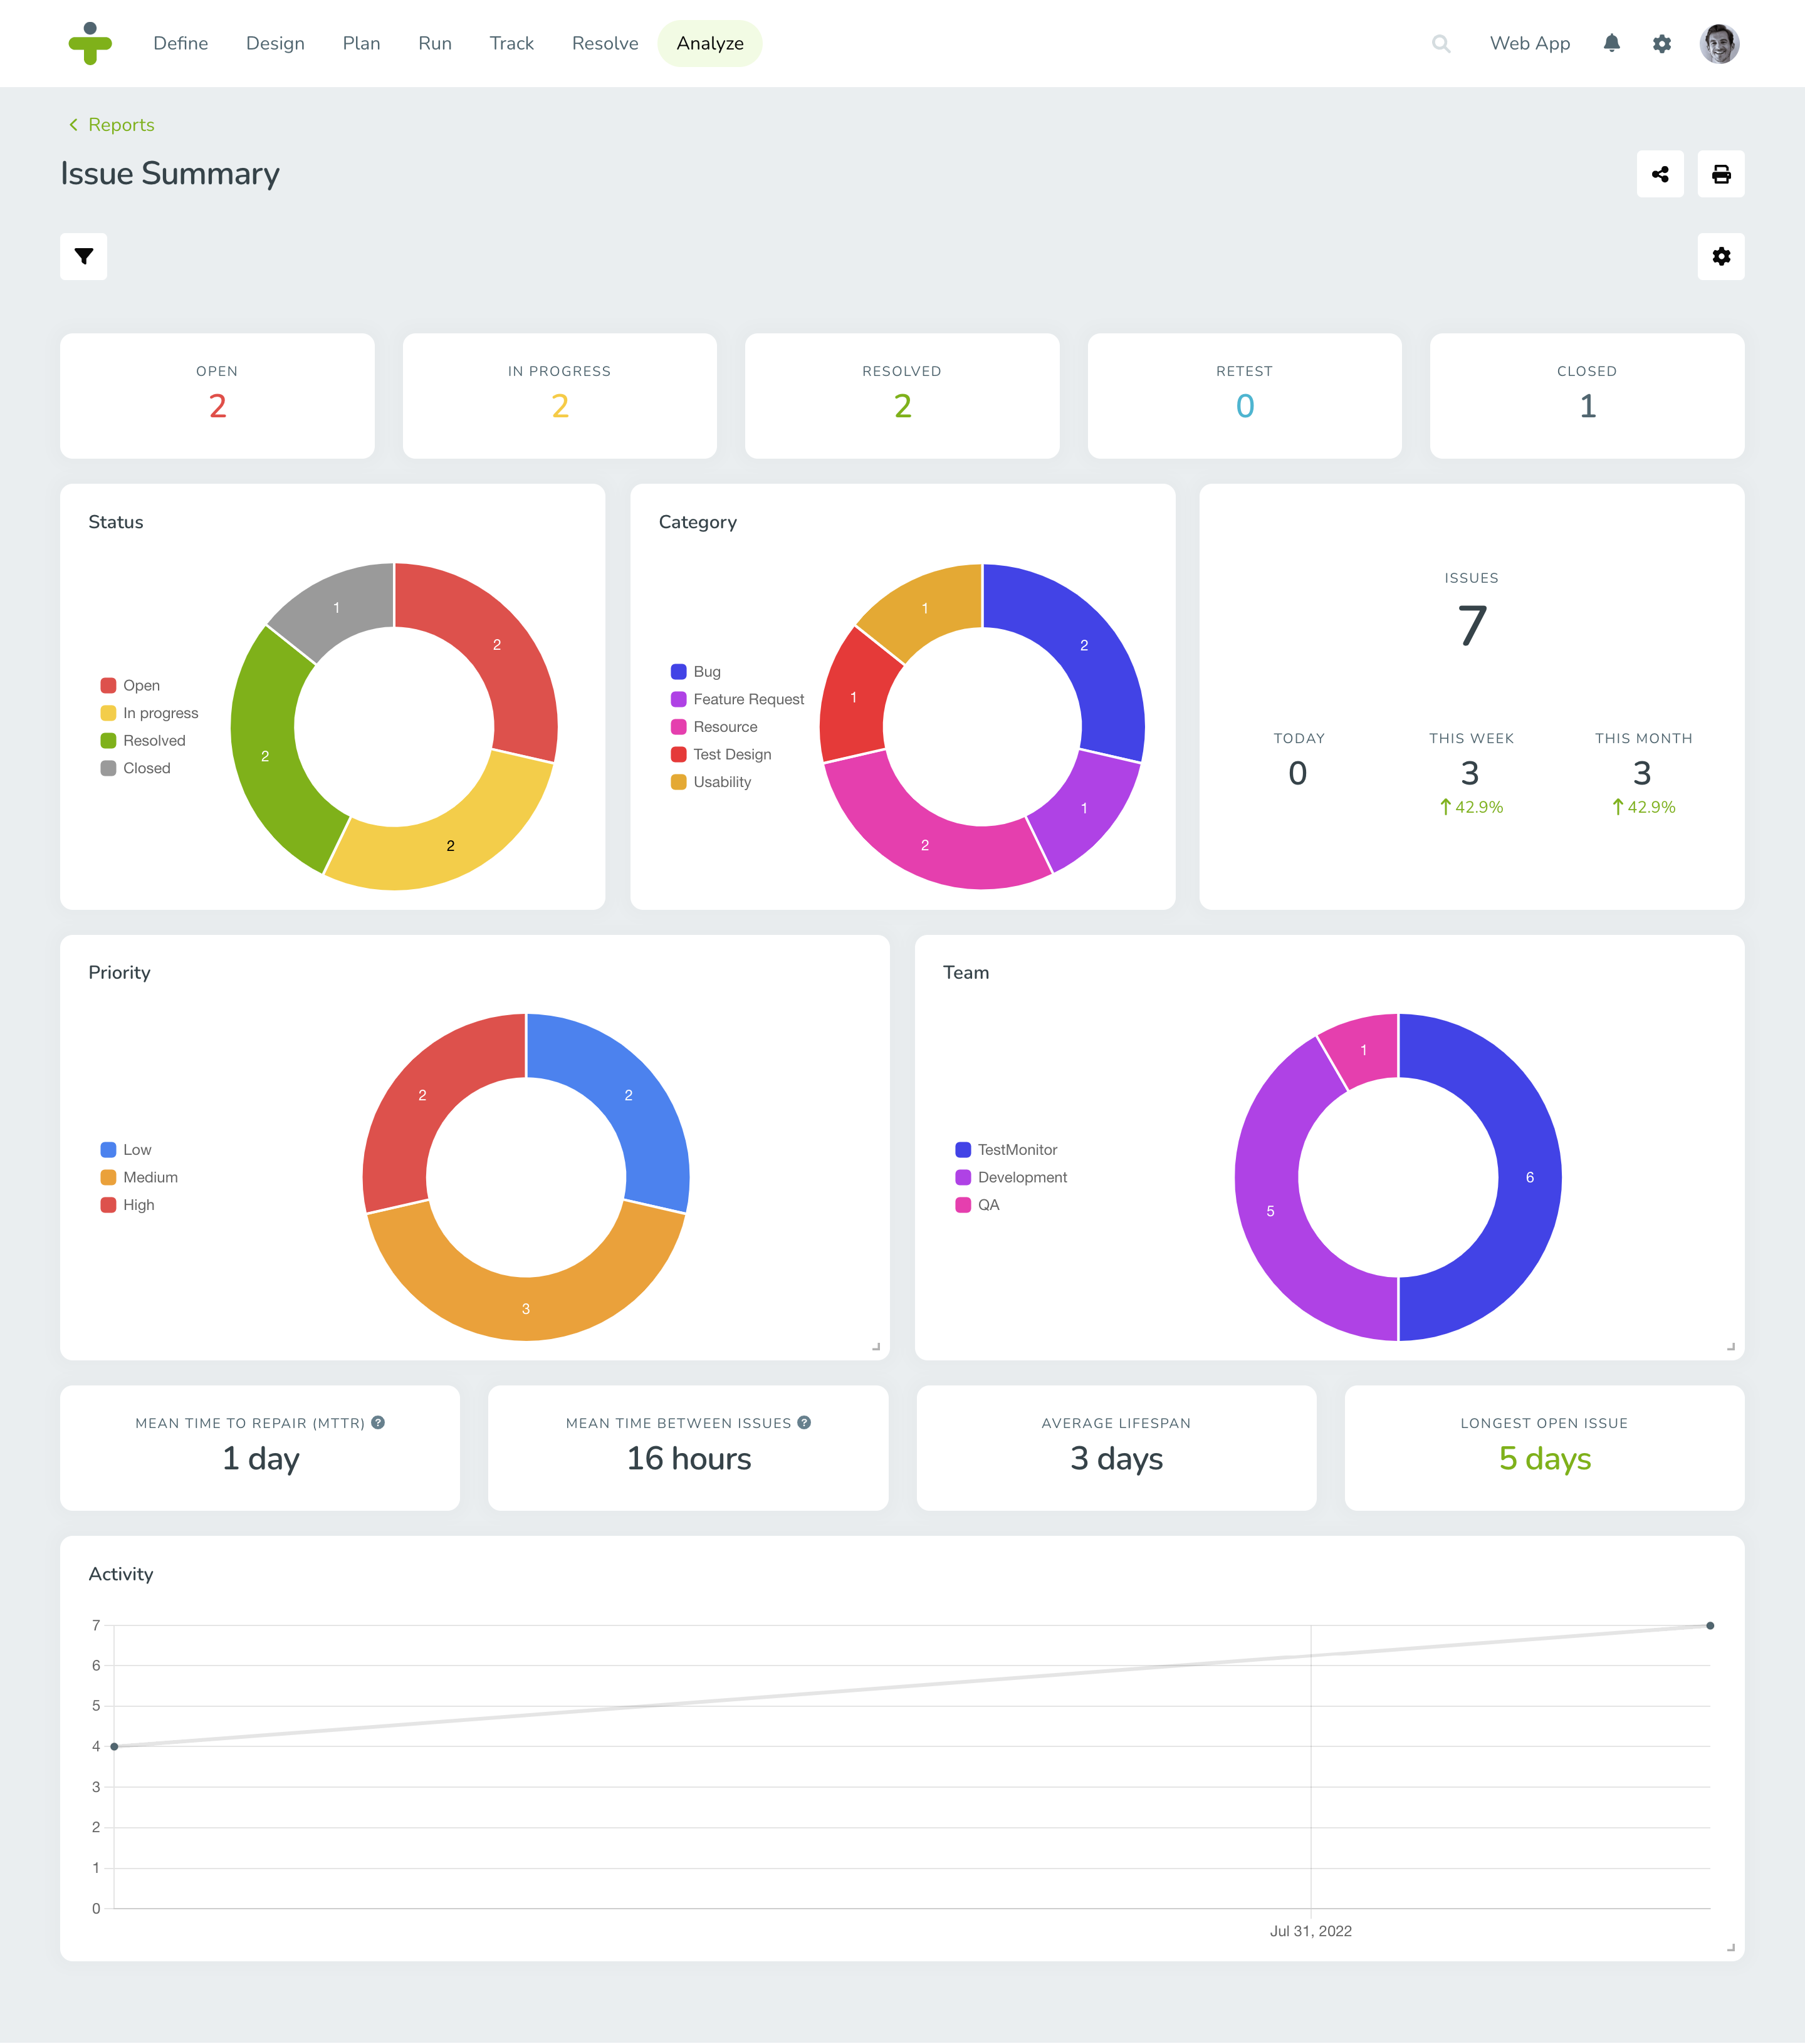
Testing Project Insights From The Issue Summary